4. Setting Values for Processing Orders#
In this step of the workflow, you will learn how to select and set data before transferring it to Airtable using the Edit Fields (Set) node. After this step, your workflow should look like this:
The next step in Nathan's workflow is to filter the data to only insert the employeeName and orderID of all processing orders into Airtable.
For this, you need to use the Edit Fields (Set) node, which allows you to select and set the data you want to transfer from one node to another.
Edit Fields node
The Edit Fields node can set completely new data as well as overwrite data that already exists. This node is crucial in workflows which expect incoming data from previous nodes, such as when inserting values into spreadsheets or databases.
Disconnect the Airtable node#
In your workflow, disconnect the Airtable node from the If node in the same way we disconnected it in the Filtering Orders lesson. Feel free to drag the Airtable node further away if your canvas feels crowded.
Configure the Edit Fields node#
Now add a new Edit Fields (Set) node by selecting the + icon for the If node's true connector and searching for Edit Fields.
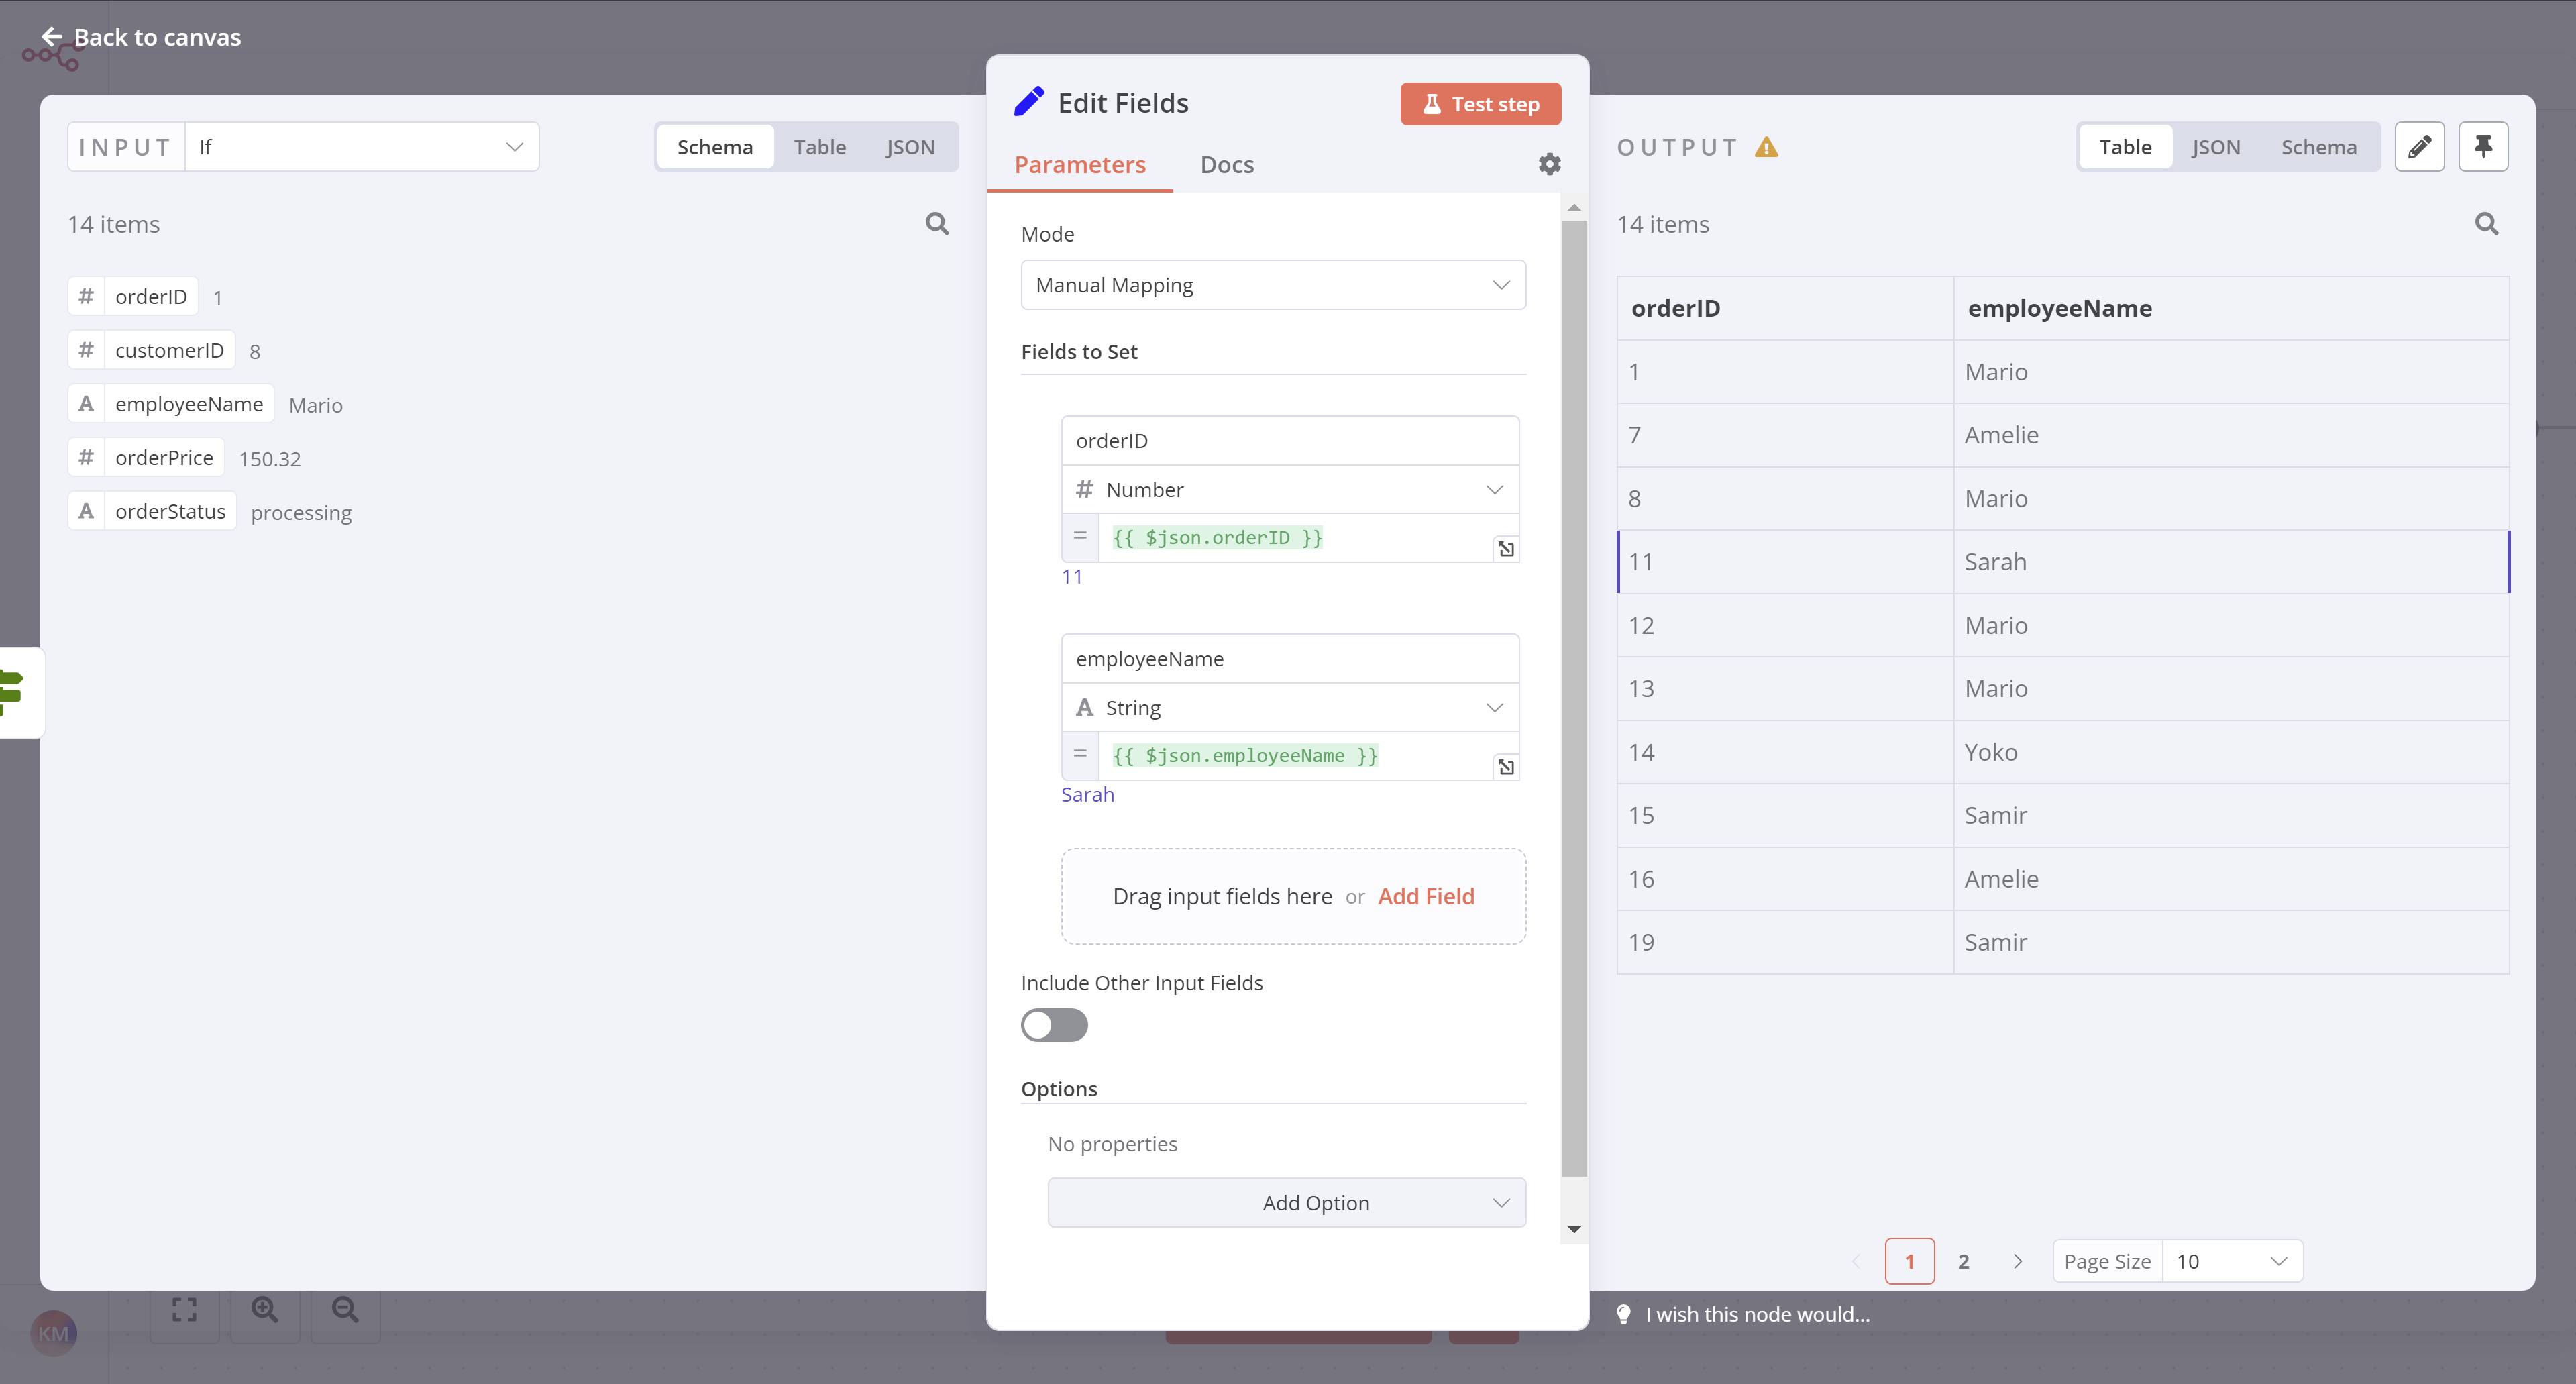
With the Edit Fields node window open, configure these parameters:
- Ensure Mode is set to Manual Mapping.
- While you can use the Expression editor we used in the Filtering Orders lesson, this time, let's drag the fields from the Input into the Fields to Set:
- Drag If > orderID as the first field.
- Drag If > employeeName as the second field.
- Ensure that Include Other Input Fields is set to false.
Select Test step. You should see the following results:
Add data to Airtable#
Next, let's insert these values into Airtable:
- Go to your Airtable base.
- Add a new table called
processingOrders. -
Replace the existing columns with two new columns:
orderID(primary field): NumberemployeeName: Single line text
Reminder
If you get stuck, refer to the Inserting data into Airtable lesson.
-
Delete the three empty rows in the new table.
- In n8n, connect the Edit Fields node connector to the Airtable node**.
- Update the Airtable node configuration to point to the new
processingOrderstable instead of theorderstable. - Test your Airtable node to be sure it inserts records into the new
processingOrderstable.
At this stage, your workflow should now look like this:
What's next?#
Nathan 🙋: You've already automated half of my work! Now I still need to calculate the booked orders for my colleagues. Can we automate that as well?
You 👩🔧: Yes! In the next step, I'll use some JavaScript code in a node to calculate the booked orders.