8. Activating and Examining the Workflow#
In this step of the workflow, you will learn how to activate your workflow and change the default workflow settings.
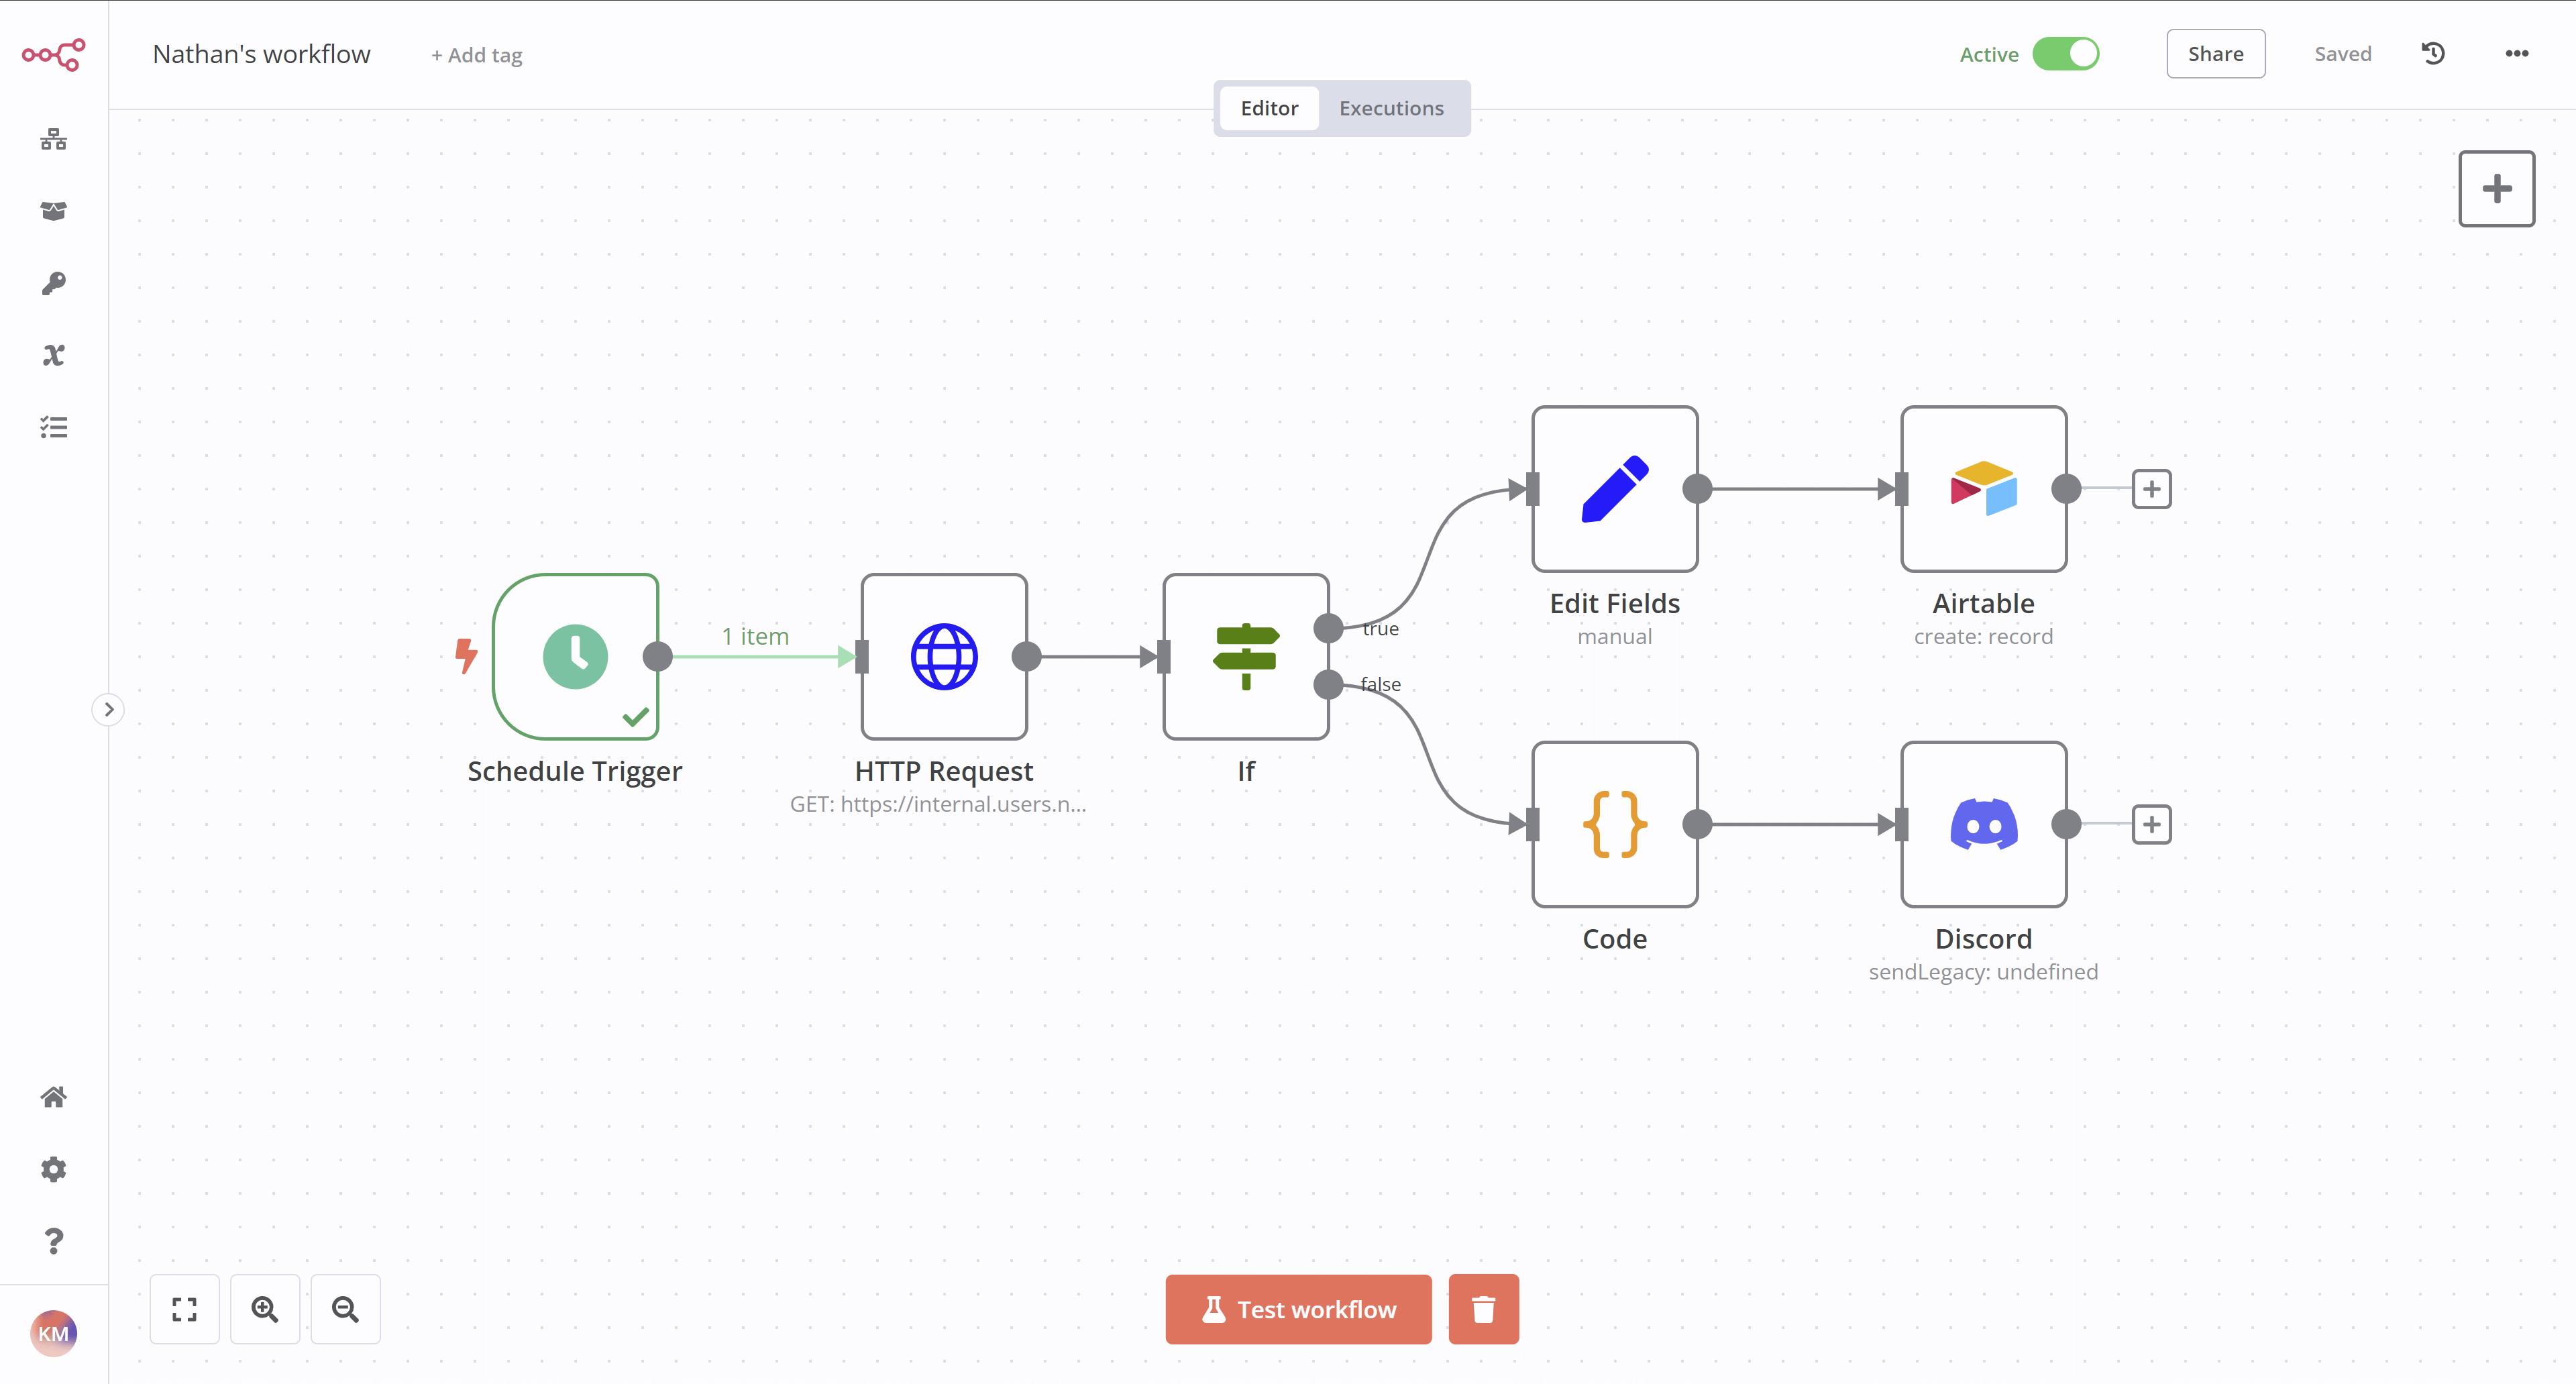
Activating a workflow means that it will run automatically every time a trigger node receives input or meets a condition. By default, all newly created workflows start deactivated.
To activate your workflow, set the Inactive toggle in the top navigation of the Editor UI to be Activated. Nathan's workflow will now be executed automatically every Monday at 9 AM:
Workflow Executions#
An execution represents a completed run of a workflow, from the first to the last node. n8n logs workflow executions, allowing you to see if the workflow succeeded or not. The execution log is useful for debugging your workflow and seeing at what stage it runs into issues.
To view the executions for a specific workflow, you can switch to the Executions tab when the workflow is open on the canvas. Use the Editor tab to swap back to the node editor.
To see the execution log for the entire n8n instance, in your Editor UI, select Overview and then select the Executions tab in the main panel.
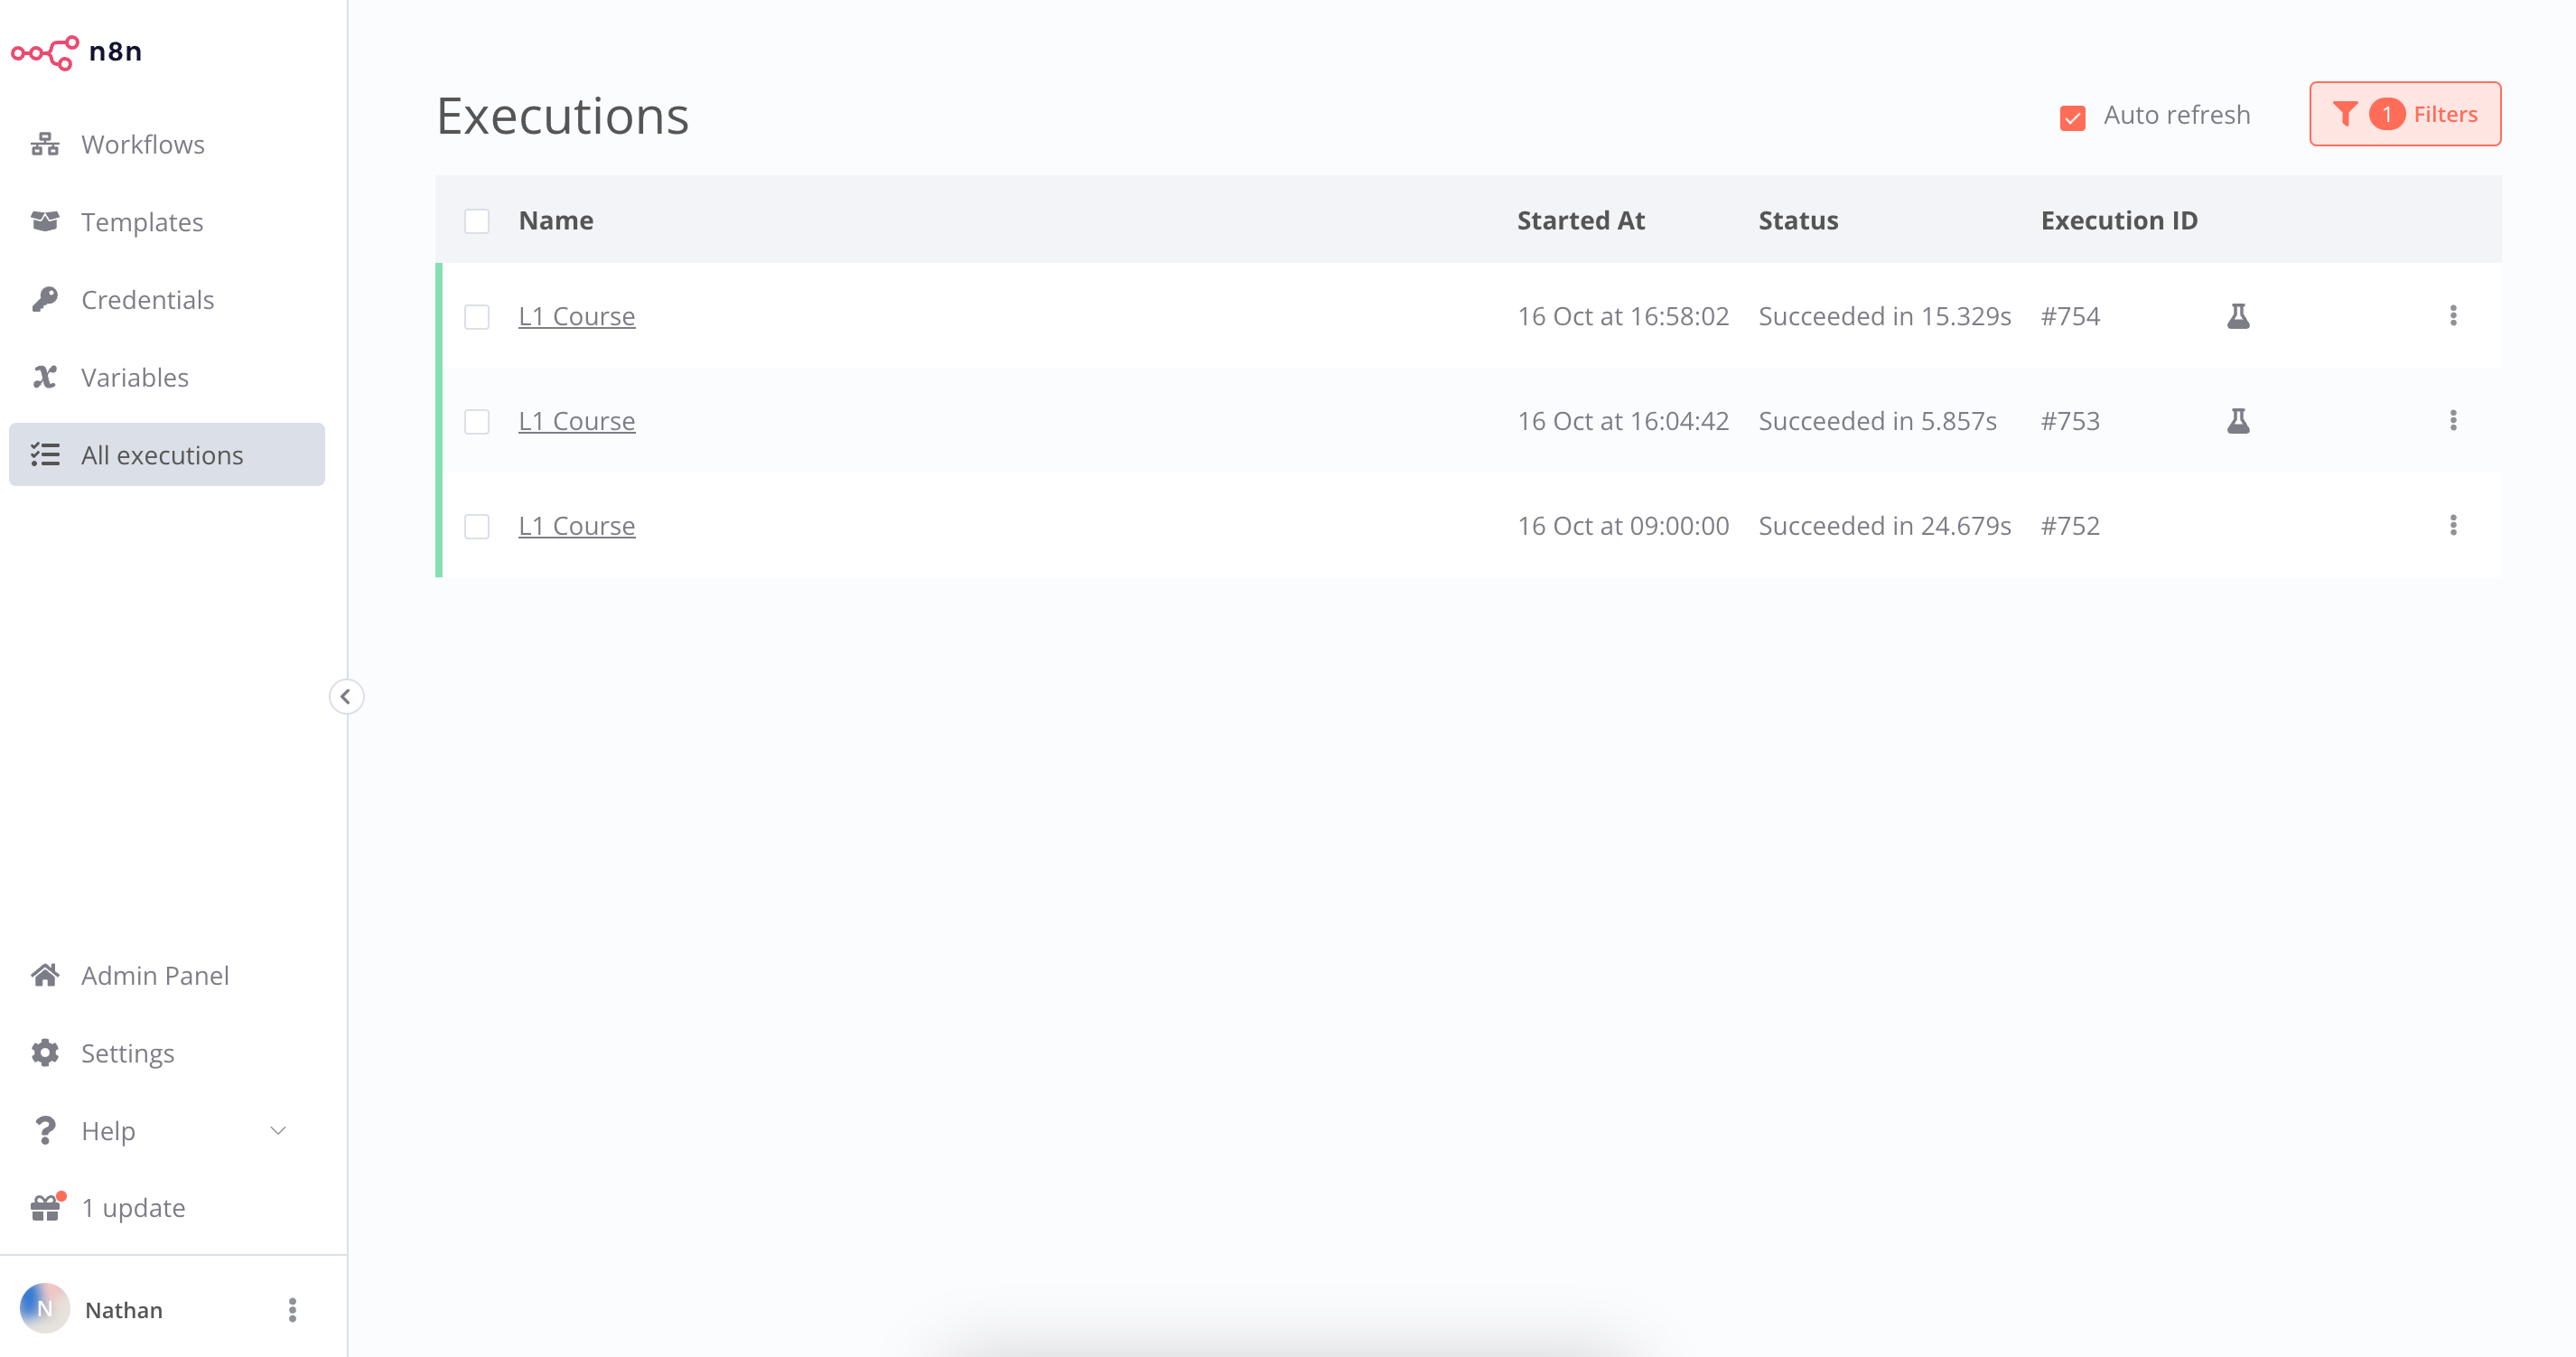
The Executions window displays a table with the following information:
- Name: The name of the workflow
- Started At: The date and time when the workflow started
- Status: The status of the workflow (Waiting, Running, Succeeded, Cancelled, or Failed) and the amount of time it took the workflow to execute
- Execution ID: The ID of this workflow execution
Workflow execution status
You can filter the displayed Executions by workflow and by status (Any Status, Failed, Cancelled, Running, Success, or Waiting). The information displayed here depends on which executions you configure to save in the Workflow Settings.
Workflow Settings#
You can customize your workflows and executions, or overwrite some global default settings in Workflow Settings.
Access these settings by selecting the three dots in the upper right corner of the Editor UI when the workflow is open on the canvas, then select Settings.
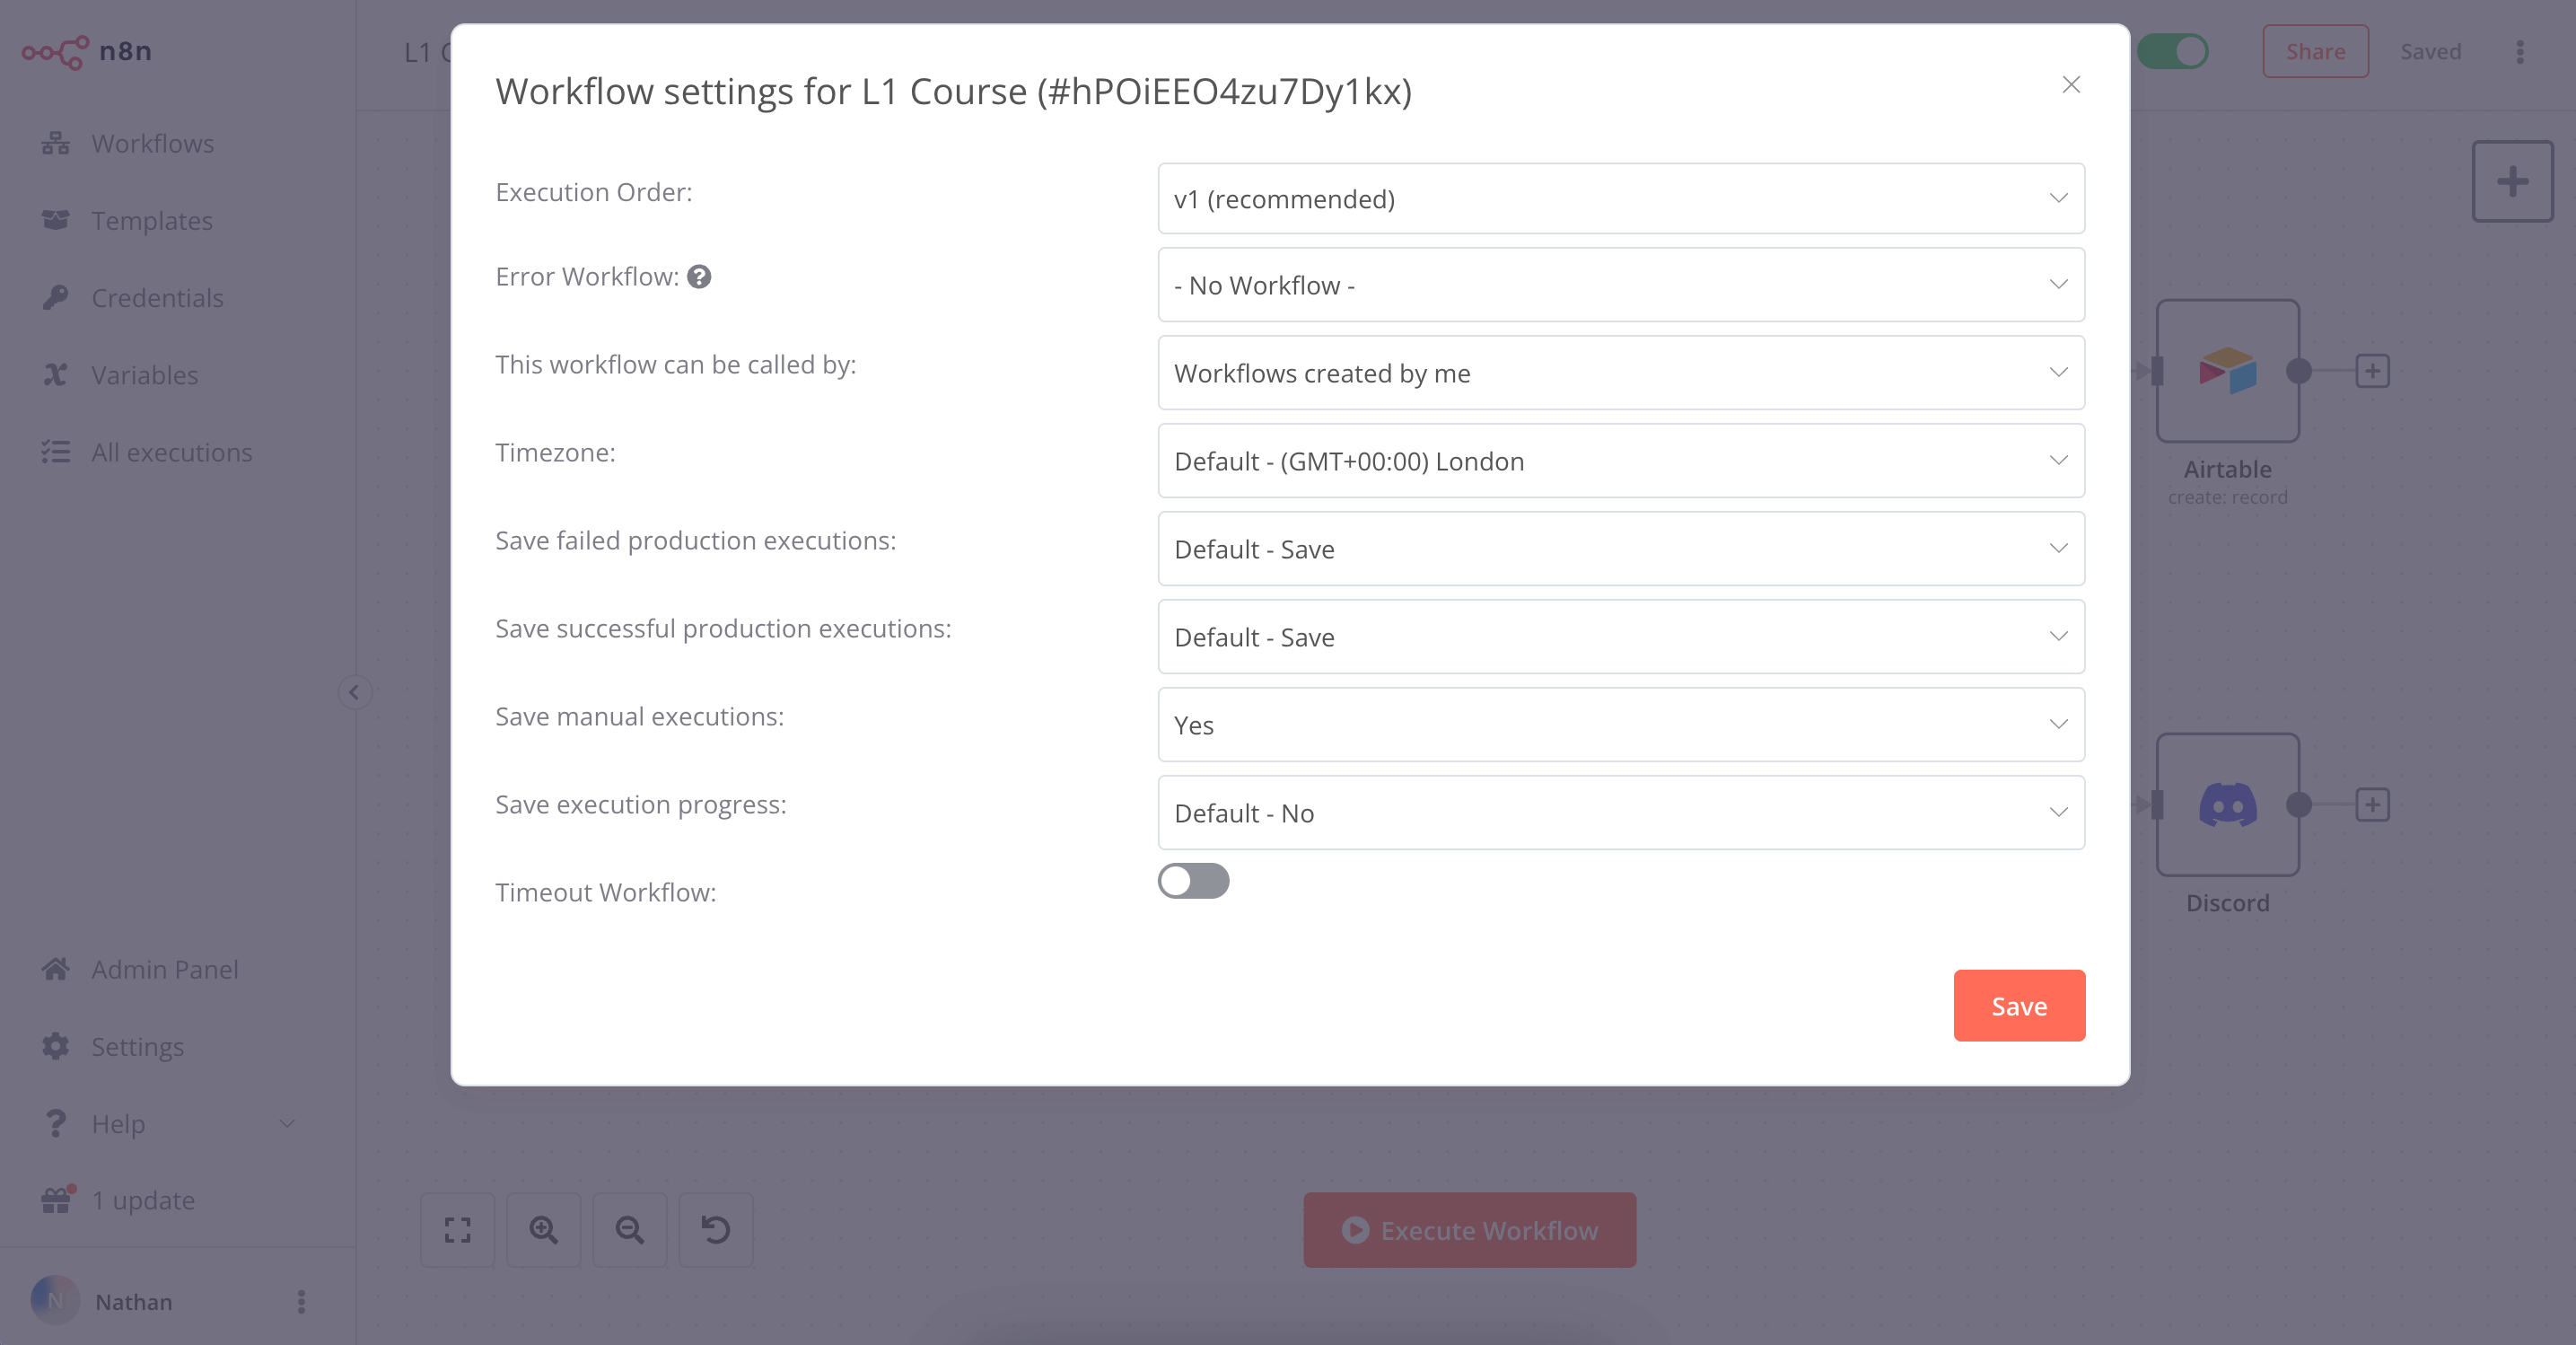
In the Workflow Settings window you can configure the following settings:
- Execution Order: Choose the execution logic for multi-branch workflows. You should leave this set to
v1if you don't have workflows that rely on the legacy execution ordering. - Error Workflow: A workflow to run if the execution of the current workflow fails.
- This workflow can be called by: Workflows allowed to call this workflow using the Execute Sub-workflow node.
- Timezone: The timezone to use in the current workflow. If not set, the global timezone. In particular, this setting is important for the Schedule Trigger node, as you want to make sure that the workflow gets executed at the right time.
- Save failed production executions: If n8n should save the Execution data of the workflow when it fails. Default is to save.
- Save successful production executions: If n8n should save the Execution data of the workflow when it succeeds. Default is to save.
- Save manual executions: If n8n should save executions started from the Editor UI. Default is to save.
- Save execution progress: If n8n should save the execution data of each node. If set to Save, you can resume the workflow from where it stopped in case of an error, though keep in mind that this might make the execution slower. Default is to not save.
- Timeout Workflow: Whether to cancel a workflow execution after a specific period of time. Default is to not timeout.
What's next?#
You 👩🔧: That was it! Now you have a 7-node workflow that will run automatically every Monday morning. You don't have to worry about remembering to wrangle the data. Instead, you can start your week with more meaningful or exciting work.
Nathan 🙋: This workflow is incredibly helpful, thank you! Now, what's next for you?
You 👩🔧: I'd like to build more workflows, share them with others, and use some workflows built by other people.